This Post May Contain Affiliate Links. We earn a commission if you click this link and make a purchase at no additional cost to you.
Today we have a guest post for you from Amber at Simple & Practical Life. Thank you Amber!
Have you ever slid open a drawer in the house with the intention of grabbing something quickly and walking away? Only to have to search for it? I’m guilty! There’s probably a scientific reason as to why drawers seem to be messy but I think it’s just out of sight, out of mind.
At some point in our lives, we all picked up life skills on how to keep our homes clean. But keeping drawers organized never seems to be a topic of conversation.
Wouldn’t it be great if you could spend 20 minutes organizing your drawers & it stay that way? Good news! There is & I’ll teach you.
The best part? You don’t have to run to the store to buy anything! Keep reading to find out exactly how to organize drawers in 20 minutes!
How To Organize Dresser Drawers
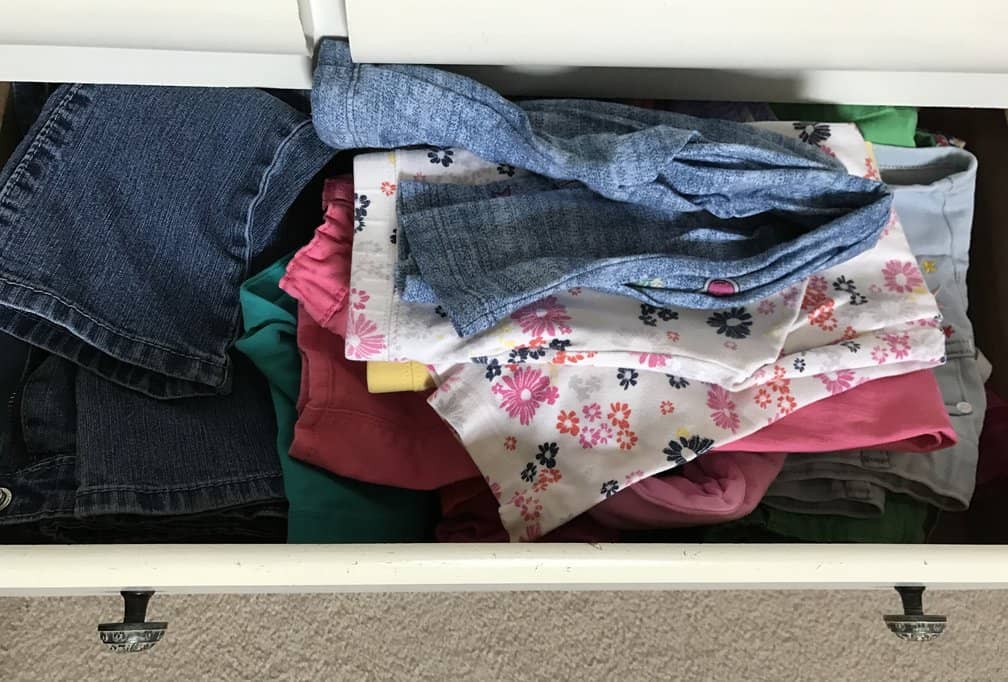
Let’s start with organizing dresser drawers. This is one of my daughter’s dresser drawers before we started. It’s so stuffed that we can barely close it.
Step 1: Dump It
Empty your whole drawer out. It doesn’t have to be done in any specific way, just dump it all out.
Step 2: Fold & Separate
The trick to organizing your dresser drawers in 20 minutes is in the folding!
The method that I use to fold is called the KonMari Method. I like to call it the store fold. You’ve seen it before and probably not paid attention to it, it’s the way all clothing stores fold their clothing. Have you ever noticed how neat & organized it is?
It’s really simple to do.
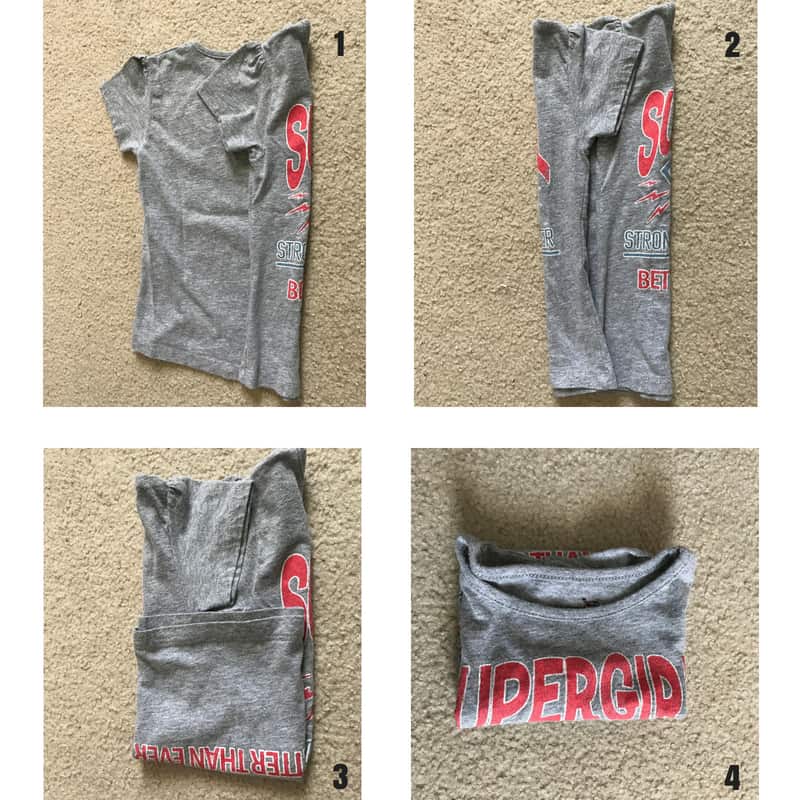
To fold shirts & tank tops:
- Lay the shirt or tank top on a flat surface with the front facing down. Smooth out any wrinkles.
- Fold each side of the sleeves over until they meet in the center of the shirt.
- Fold the bottom of the shirt up to the center point.
- Fold the top half of the shirt down to meet the center point.
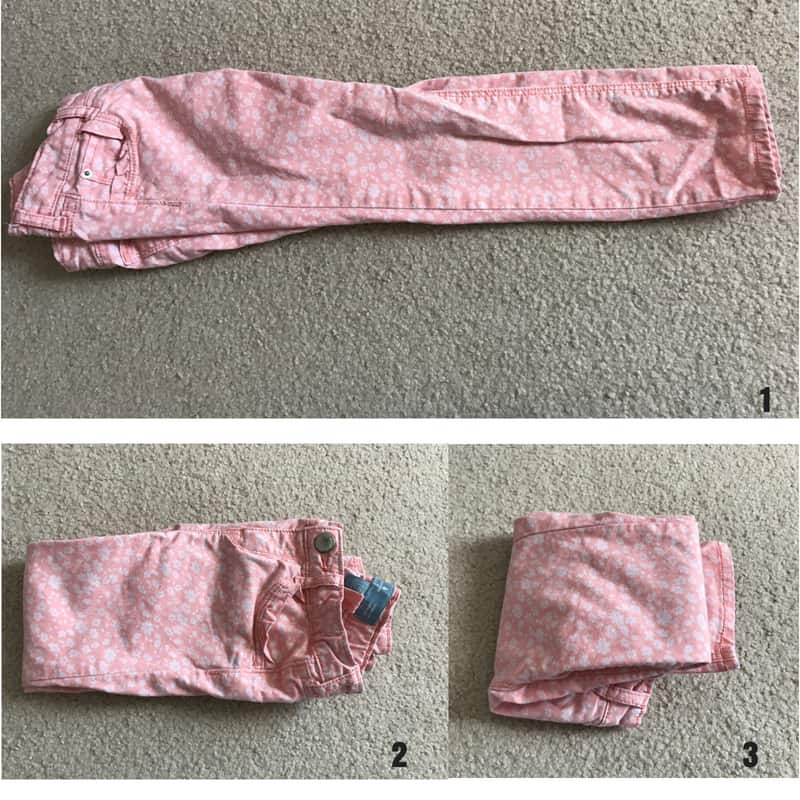
Here’s how to fold pants:
- Lay the pants down on a flat surface with the front seam/button facing down.
- Now, fold the pants over, lengthwise. Be sure to straighten out the legs to avoid wrinkles.
- Grasp both of the legs & fold them up from the bottom until they meet the top of the pants.
- Fold the pants in half one more time.
You can use either method above to also fold your underwear. Are you wondering why would I fold my underwear? I admit, I used to wonder why people did it too. The answer to the riddle is simple, it saves spaces & keeps you organized. When you’re already late for a party, you don’t want to spend an extra 5 minutes searching for the right underwear to wear with your dress.
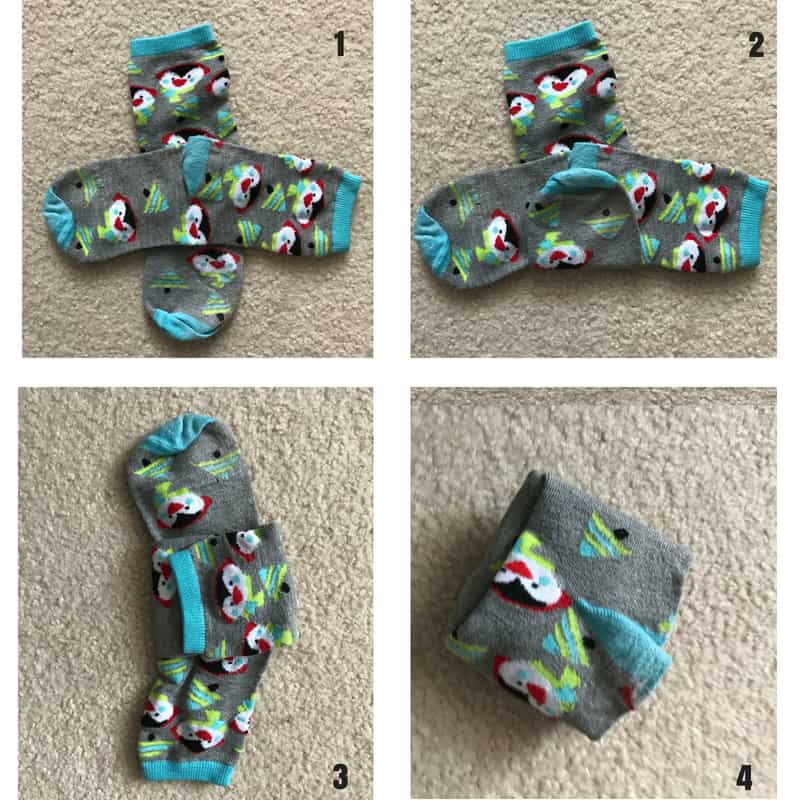
Folding socks can be done two ways. You can roll them together, but that takes up more space. Or you can fold them flatly.
To fold socks:
- Lay your socks down on a flat surface in a “T” shape.
- Now fold the bottom sock over the top sock.
- Then fold the top sock over the bottom sock. It will give you an almost perfect square.
- Optional: you can tuck the toes of the socks into the pockets that the fold creates. This will prevent the socks from coming apart.
That’s all it takes. Once you get the hang of it, you’ll be a professional folder in no time.
If you have different types of clothes in the drawer or want to organize it by color, you’ll need to separate them into piles while you’re folding.
Why do it while you’re folding? Simply because it will save you time. When you sort then fold or vice versa, it’s only adding more steps that could be combined into one.
Step 3: Put It Back
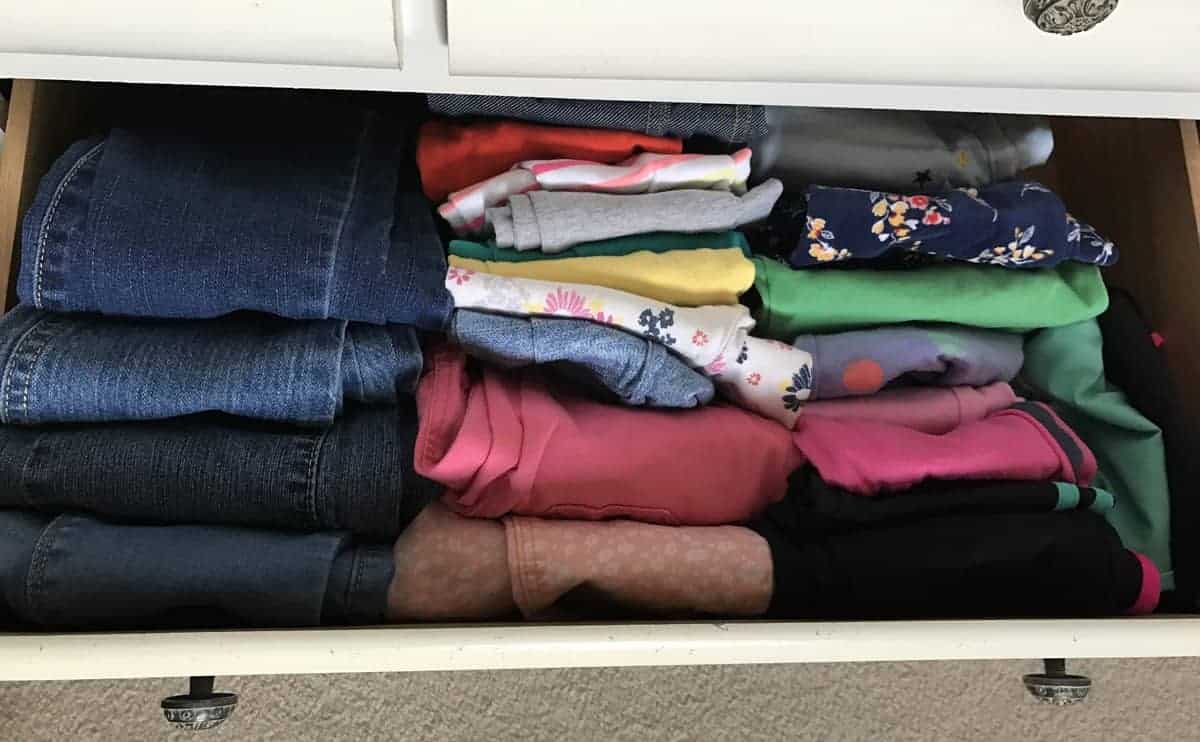
Now that it’s all folded, put it back in the drawer. BUT, you need to put them back in “standing up” instead of stacking them on top of each other.
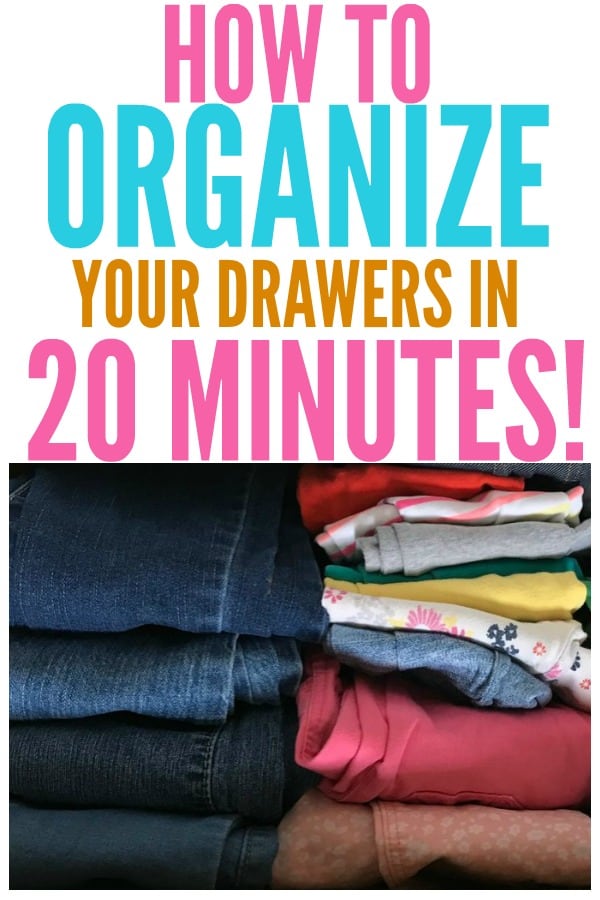
Here’s my daughter’s finished drawer.
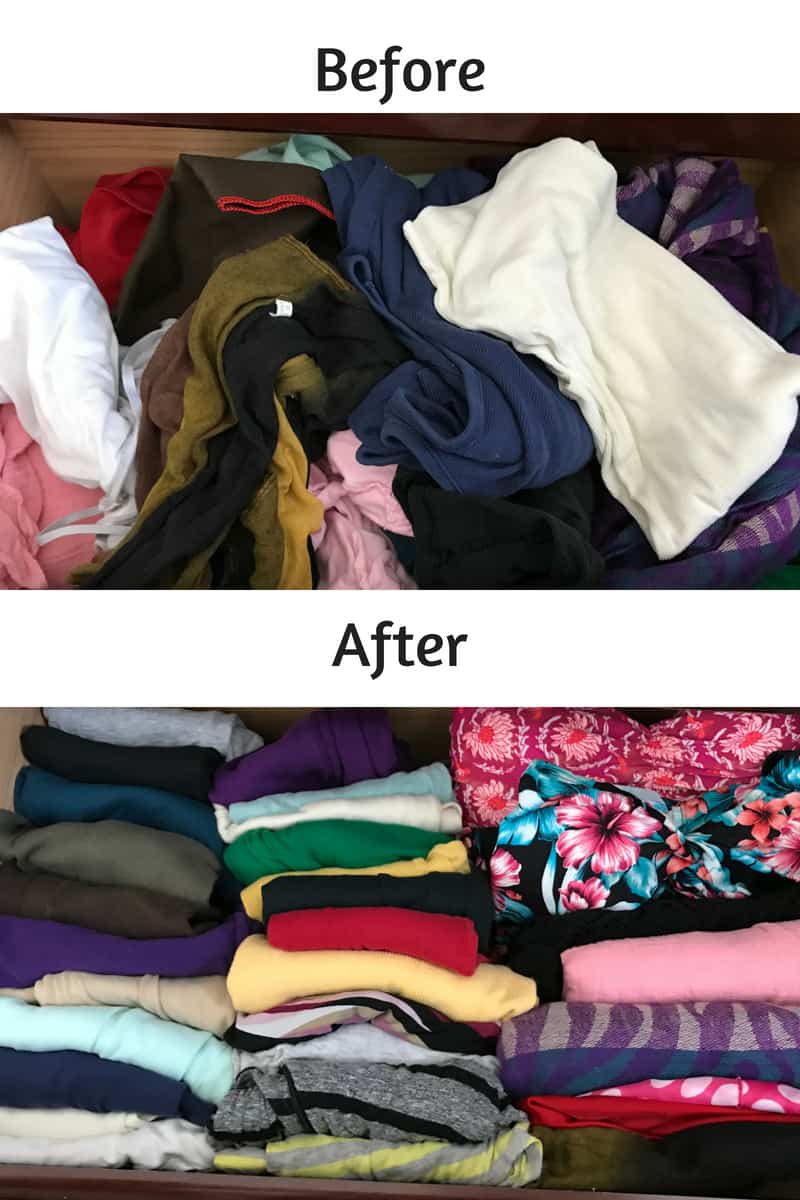
And the before & after of one of mine. I actually created more space & was able to add some scarves & swimsuits to the drawer!
How To Organize Junk Drawers
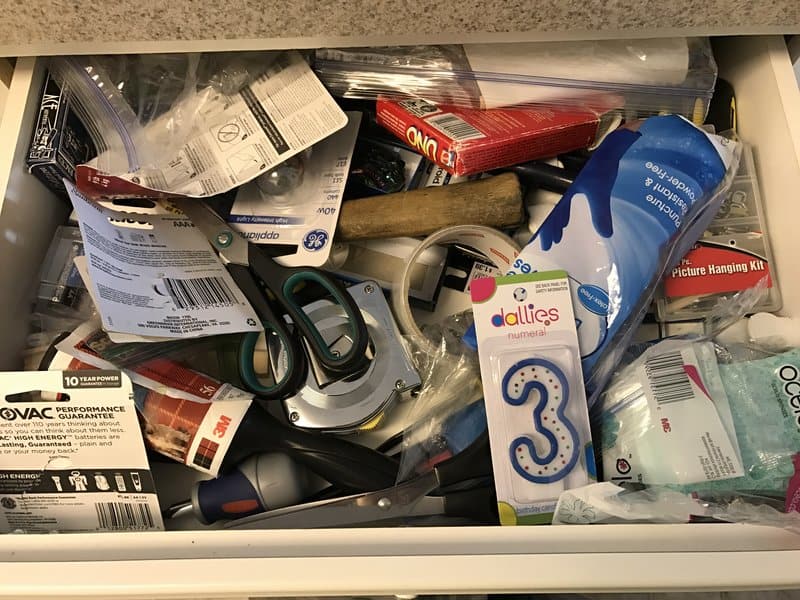
We all have a junk drawer somewhere in the house. A place where we throw just about any & everything in. Ours is in the kitchen & it’s filled with the most random of items.
After pricking myself on a nail, I decided that organizing the junk drawer was just as important as organizing dresser drawers.
Before you begin you will need two items. A trash bag or trash can & Tupperware. Yes, Tupperware. You know all those plastic containers that you have laying around? Grab 4 or 5 of them. Don’t worry about the lids, you won’t need those.
Now, lets set the timer for 20 minutes…
Step 1: Empty It
Just like when we organized our dresser, we have to get everything out of the drawer. For clearing out the junk drawer, I suggest clearing an area on the floor, counter, or table. That way, all of those little pieces that you have in there won’t go missing.
Step 2: Sort & Trash
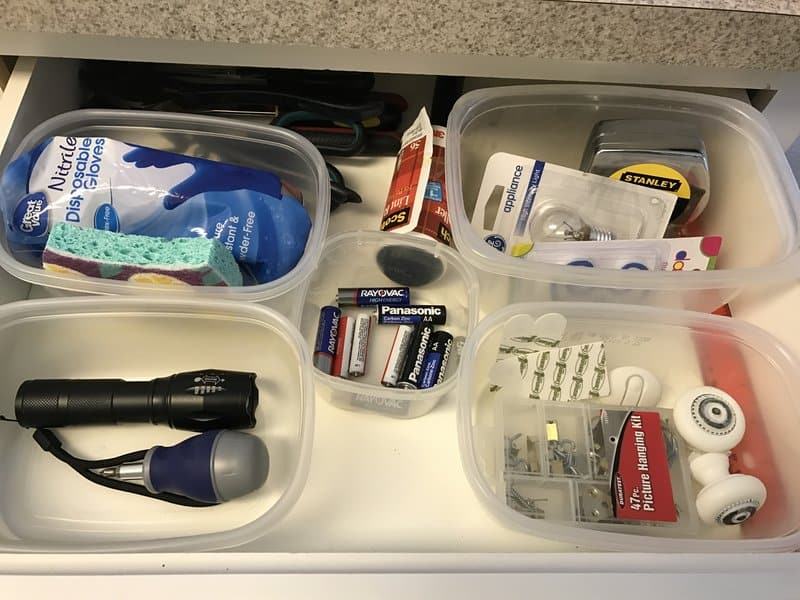
Now, start going through it all. If you have empty, broken, or items that you have no idea what they are; throw them out. Sort the items that you decide to keep into the containers.
Make sure that you are sorting everything as you pick it up. If there’s a command strip put it in the picture hanging box. If there’s a bag of candy from last Halloween, throw it away.
Here’s an idea of how you can sort them:
- Batteries
- Nails & screws
- Cleaning stuff (gloves, sponges, lint rollers)
- Tape
- Candles
- Flashlights
- Lightbulbs
- Sewing accessories (needle & thread, safety pins)
- First aid
Put the containers into the drawer & you’re done! If you have items like screw drivers or scissors that are too large for containers then place them in the back of the drawer.
Look at how clean that looks. This particular drawer actually took less than 20 minutes to organize.
It’s amazing what you can get done in 20 minutes or less!





Leave a Reply