This Post May Contain Affiliate Links. We earn a commission if you click this link and make a purchase at no additional cost to you.
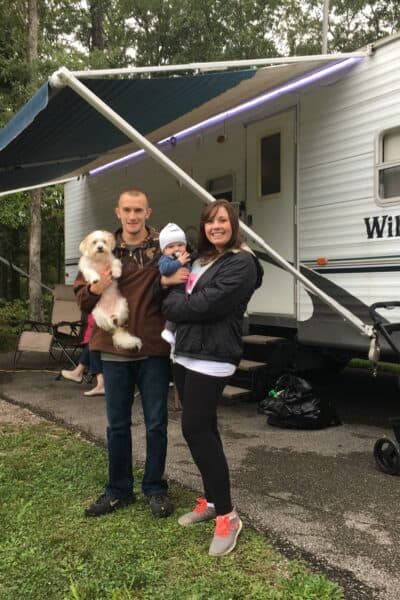
I am so excited to finally be able to share our camper remodel with you all! Last summer we decided to finally take the plunge and invest in a camper! Camping has been part of our family for many years and it is even how my husband and I met! We really wanted to teach our son to love the outdoors and spend his summers playing outside and we figured camping was the best way to do that!
So our search began for a camper! We quickly realized that purchasing a used camper from an RV store was going to be an overpriced investment. We really didn’t want to invest $6,000 – $8,000 in a camper from an RV Store that needed a complete gut and remodel. But thankfully our gracious friends came to the rescue and sold us their 2006 Forest River Wildwood Travel Trailer! Check out our camper remodel below!
Before Camper Remodel
When we began our search for a camper I was really hoping to find one that needed some upgrades and that I could put my own spin on. I love to remodel and redecorate so I couldn’t wait to start a new project! The camper we purchased turned out to be a great investment! It was in great condition but the upholstery was far from making me a happy camper!
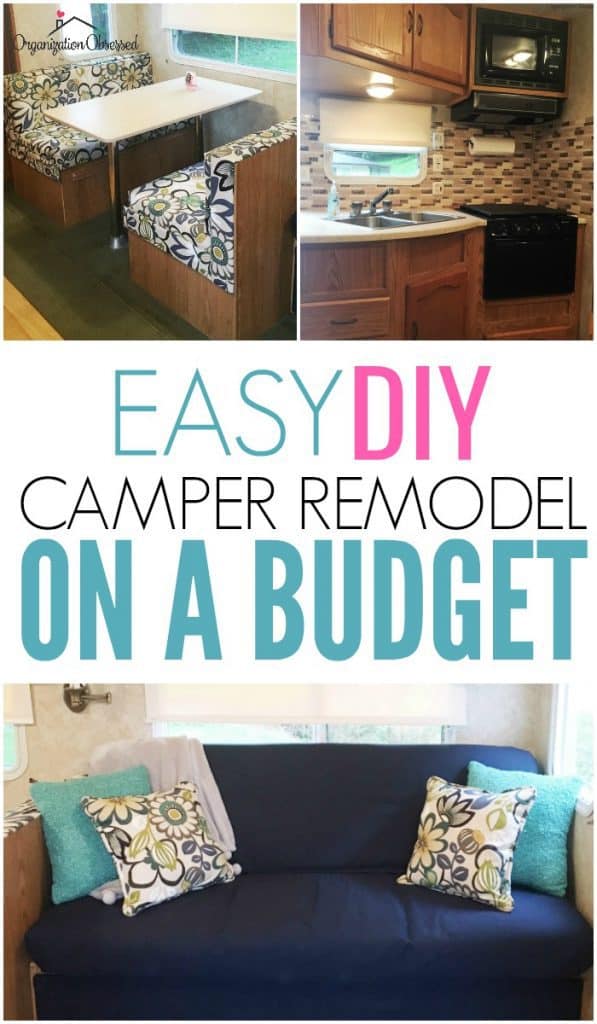
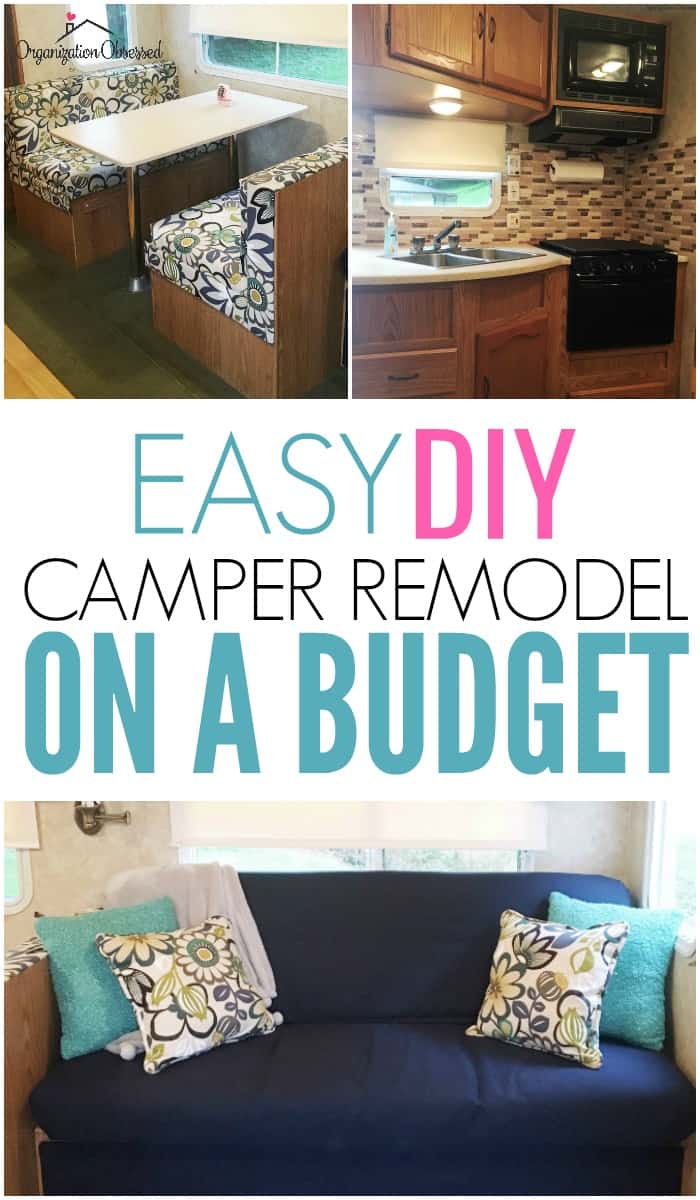
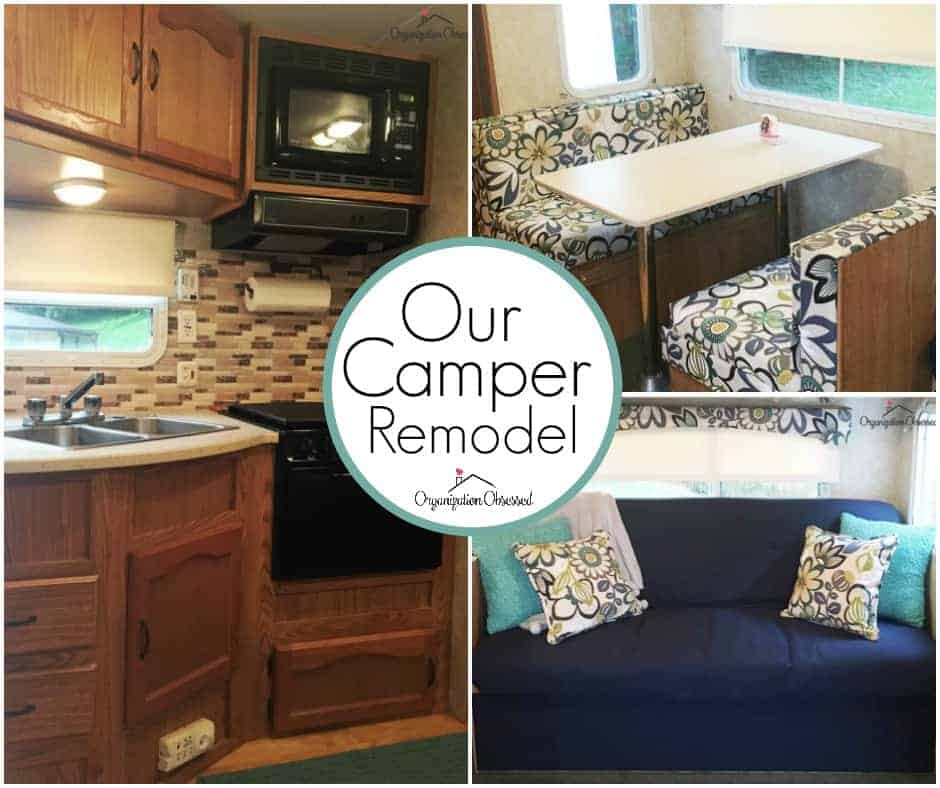
The Couch
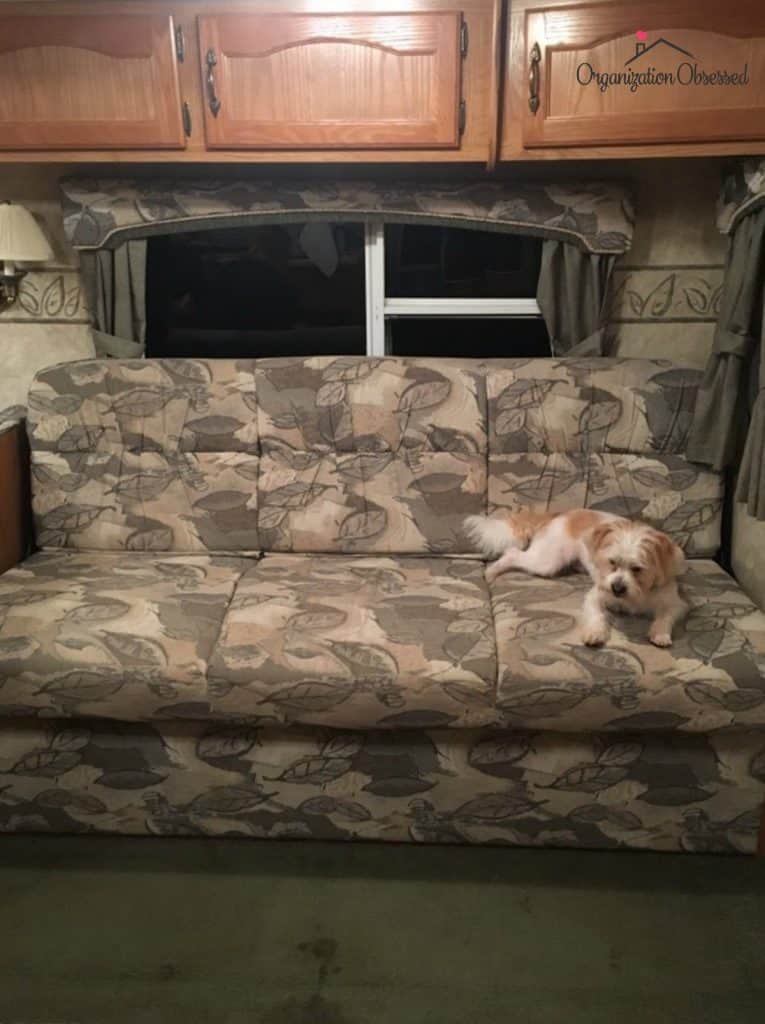
The couch, table cushions, and cornice boards were all covered in this worn out, ugly leaf pattern. It had to go! We started by removing all the cornice boards, window blinds, the jackknife couch, and table cushions. Most things came off very easily with a drill and the right drill bits. Most screws used a square bit, but it may vary between camper models.
The Booth
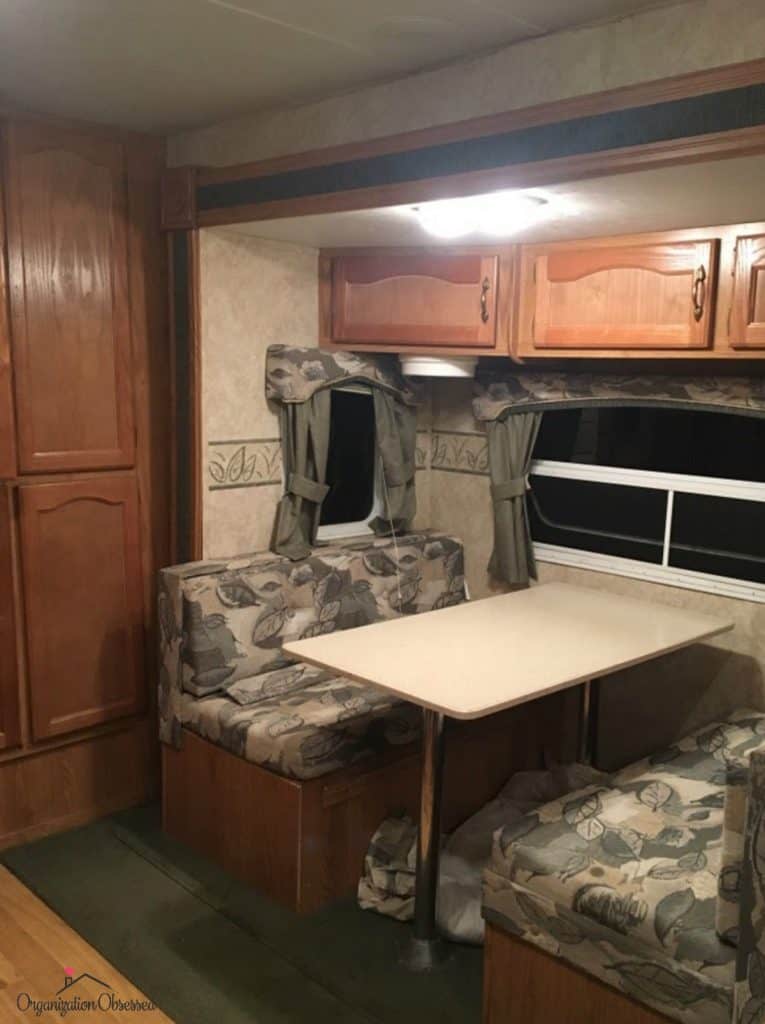
We reupholstered our booth cushions with a method I like to call the gift wrapping method. You can read more about that here. We also removed the leaf border on the camper walls. The border was very easy to pull off. It was a stick and peel kind of border instead of glued on. After we got it all peeled off, we took a rag and soaked it in goo-gone to remove the left behind residue.
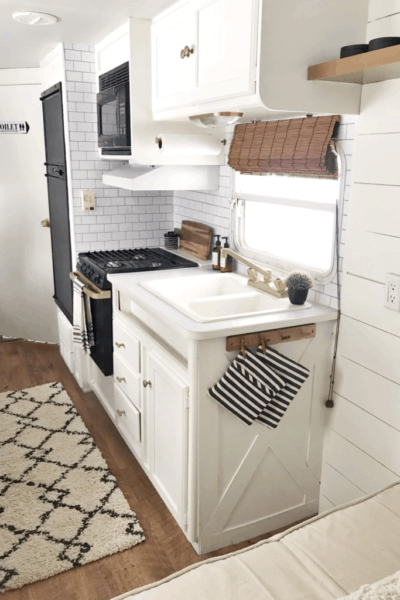
Kitchen
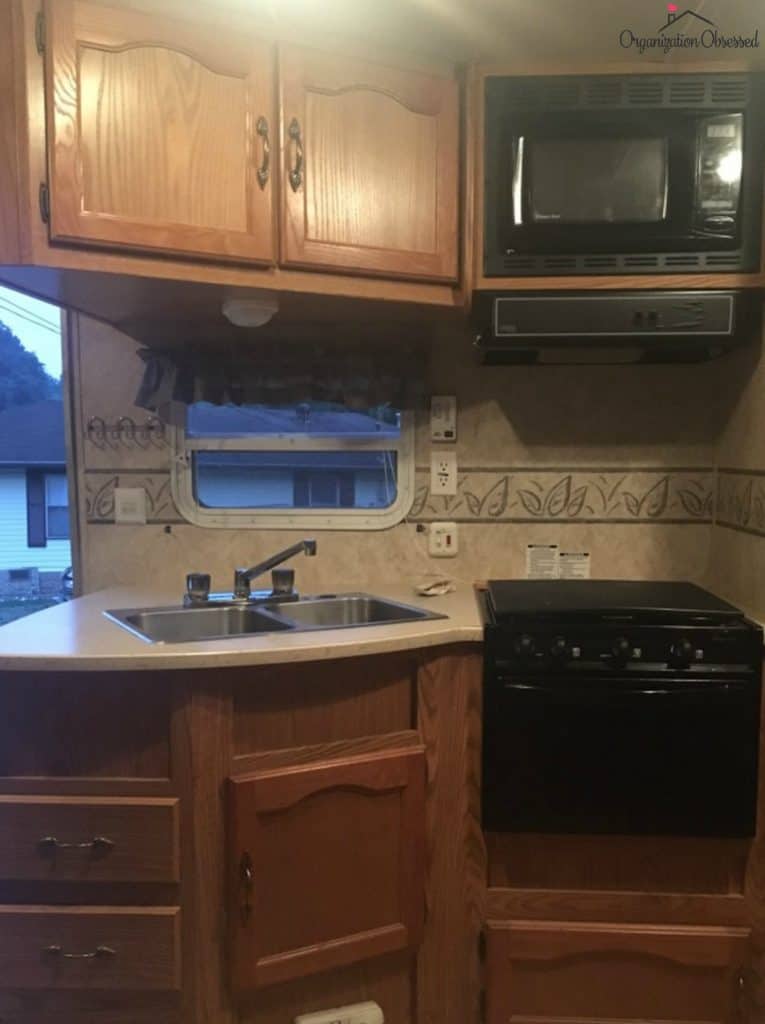
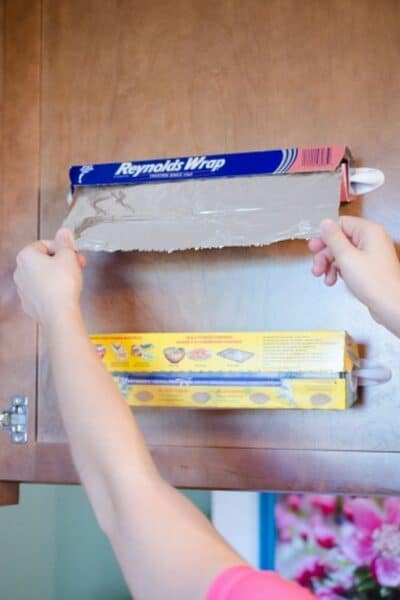
In the kitchen not much had to be done. We just removed the leaf border and took down the curtain over the window. We gave the drawers and cabinets a good cleaning and installed contact paper in the drawers to keep them clean.
Bunk Beds
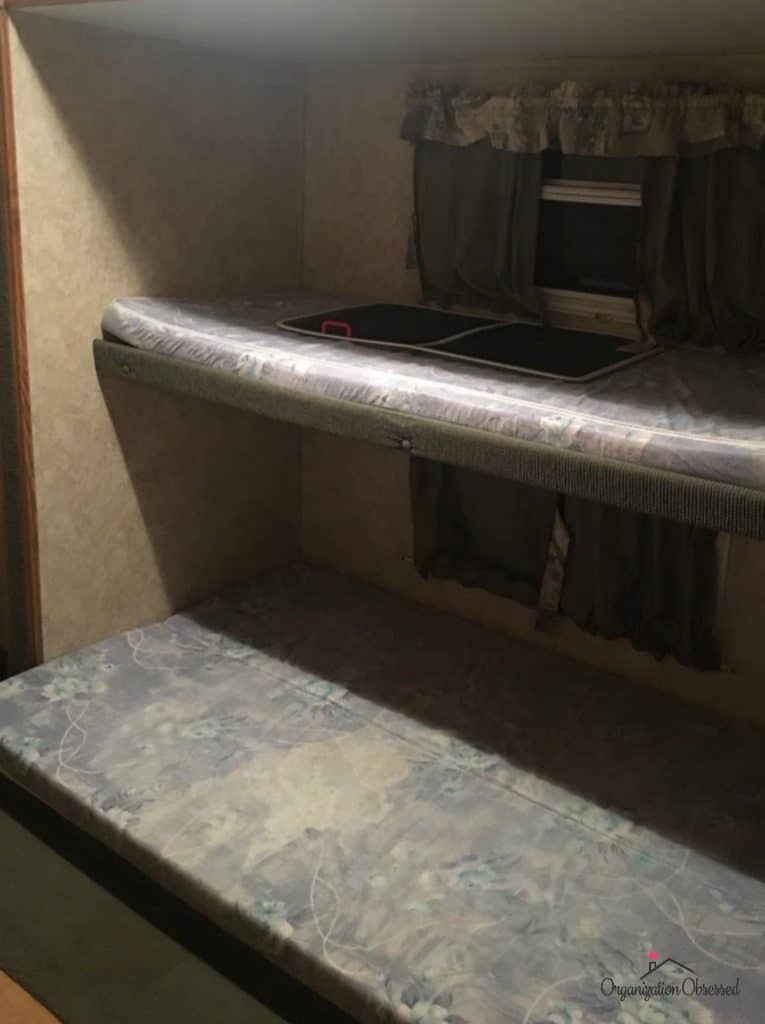
Our camper has two slide outs and one of them is a second bedroom with bunk beds. We love this room! It is perfect for our little boy! Not much had to be done in here. We just had to remove the curtains and the hardware from them. We didn’t have to do any major work to the bathroom and master bedroom either. Luckily most of our repairs were small or just cosmetic!
After Camper Remodel
The Couch
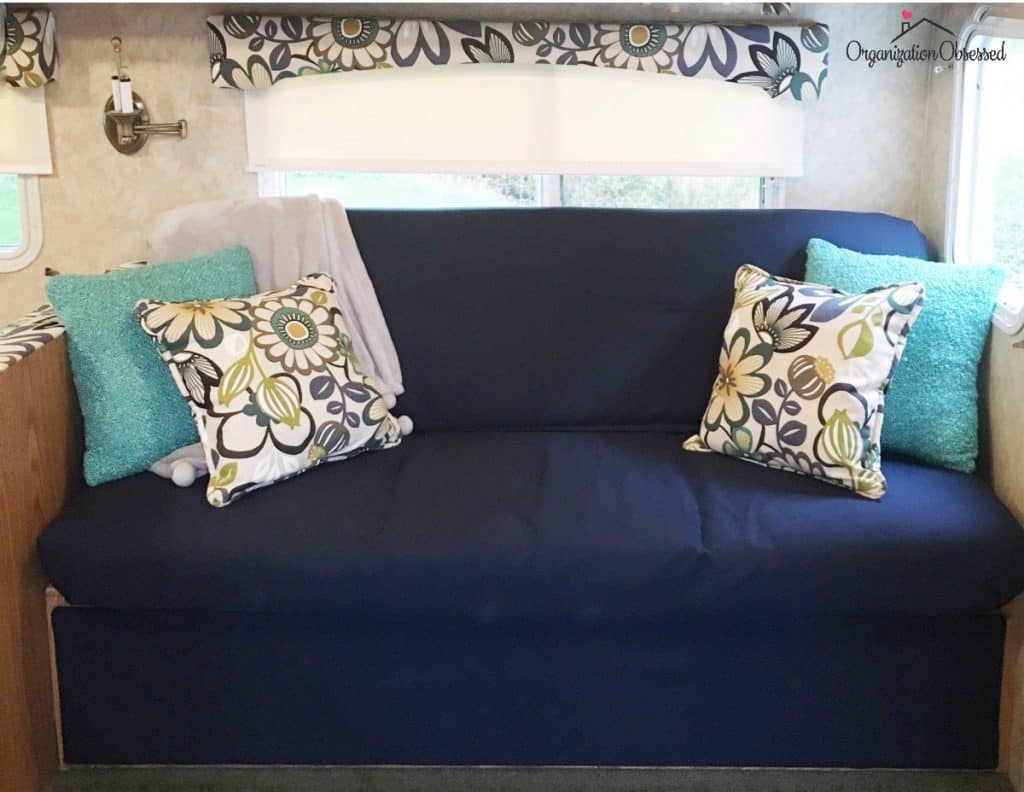
Our after picture of the jackknife sofa! Isn’t is SO. MUCH. BETTER! The hardest part of this whole remodel was reupholstering that sofa. I didn’t have any interest in paying someone to reupholster the sofa for me so I had to get creative! I wish I had pictures throughout the process, but I didn’t have a blog then and never knew I would need them. We used a navy canvas fabric from Hobby Lobby. It is very durable and cleans up well! For extra safety, before using our camper I sprayed all the fabric with Scotchguard Fabric Protector.
The fabric for the cornice boards, booth, and pillows came from Fabric.com. It took 10 yards to redo the booth and all the cornice boards.
I searched long and hard for a fabric that I knew I could be happy with for a long time and this fabric turned out to be perfect! It is made from a canvas material and is very durable! Plus it is BEAUTIFUL! It brightened up our camper so much! It was way more than I wanted to pay for it, but I also wanted it to last so we bit the bullet and went ahead it. The fabric all together cost around $200 dollars.
I lost the shade for the light on the wall and I have yet to find the right size to replace it. I am debating on just replacing the whole light instead.
The Booth
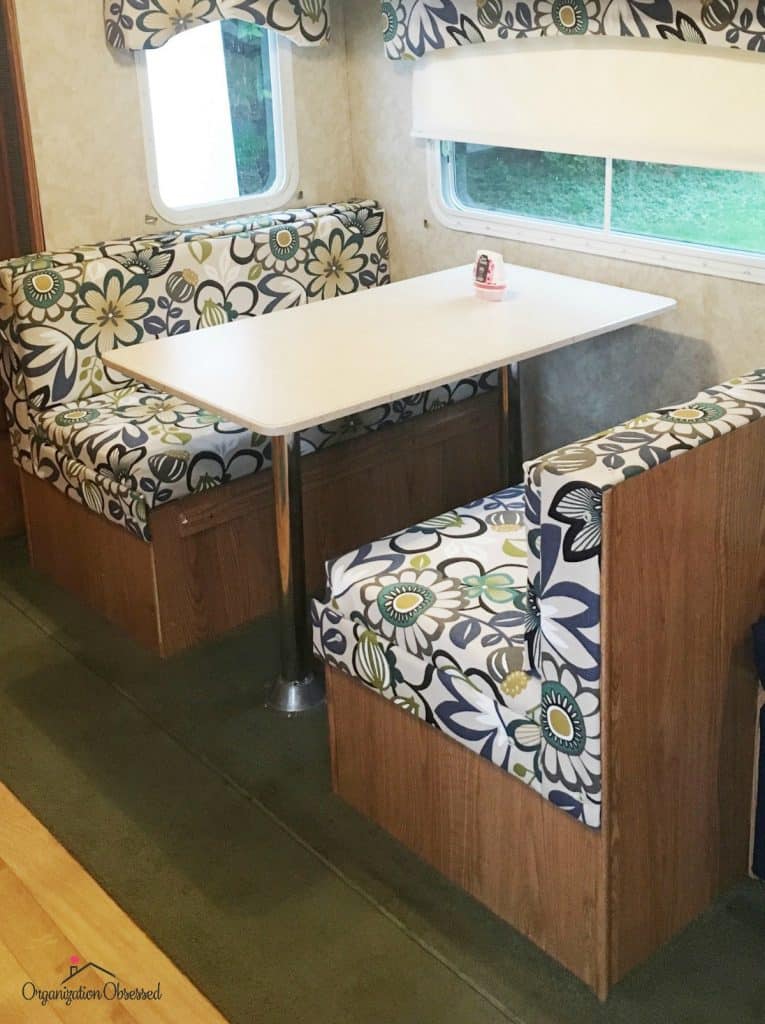
Our booth turned out perfect! I love eating breakfast here while we’re camping and looking out the windows in the morning! Replacing the fabric really brightened up the space! Instead of putting blinds back on the windows we used pull shades. We chose an off white color to match the wallpaper in the camper. They were really easy to install with just a few brackets holding them in place. Lowes cut each blind to the correct size for us.
The Kitchen
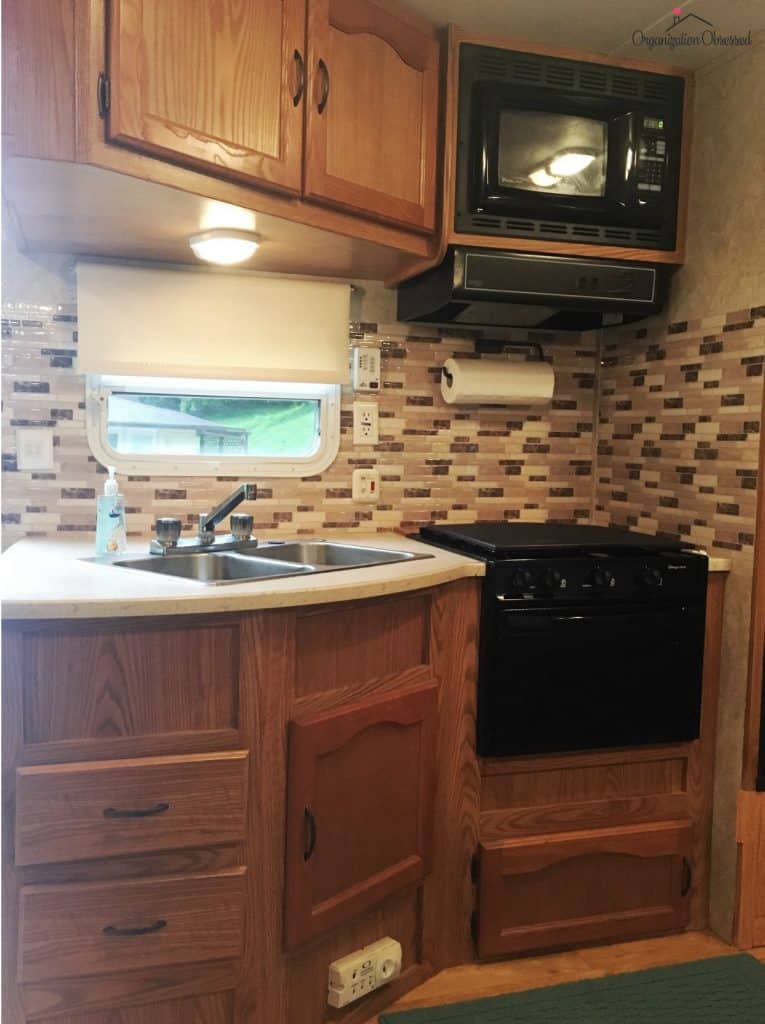
The kitchen was the one area of the camper that we did a ton of work on! We used adhesive backsplash to put up a backsplash behind the sink. It was easy to install but tedious. It took about 15 pieces to complete. But it looks amazing and after a year it still looks great and hasn’t peeled at all. We also installed this paper towel bar for extra storage! It is perfect and holds our towels in place even when we are towing the camper.
Bunk Beds
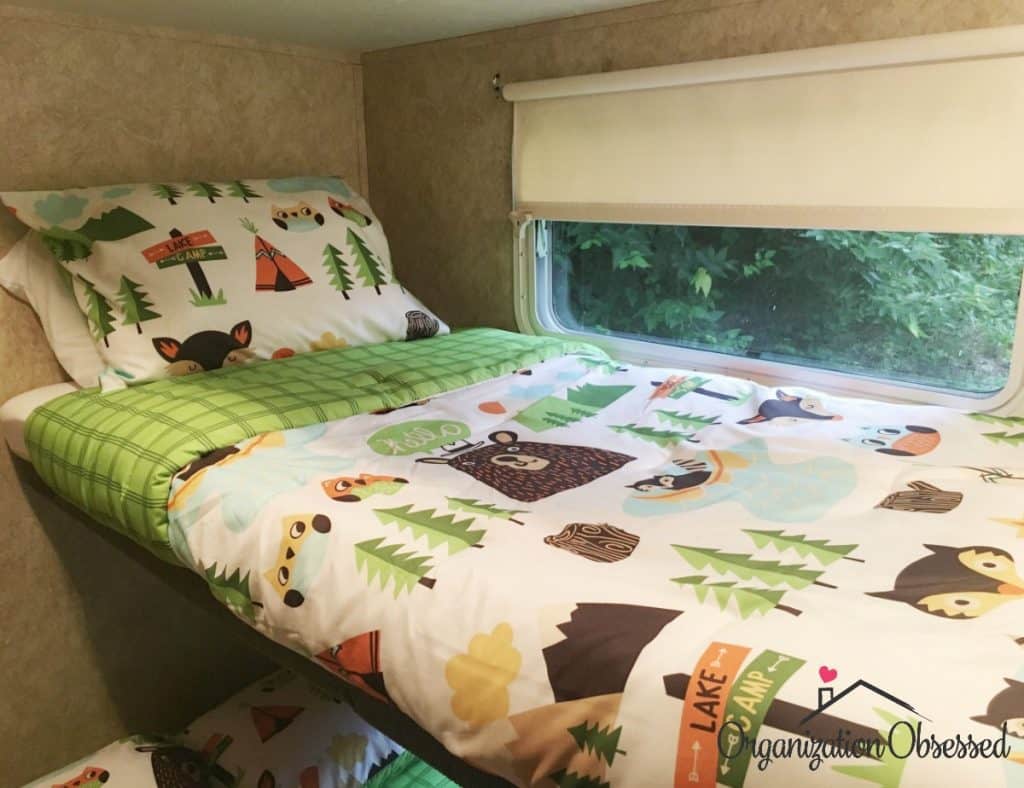
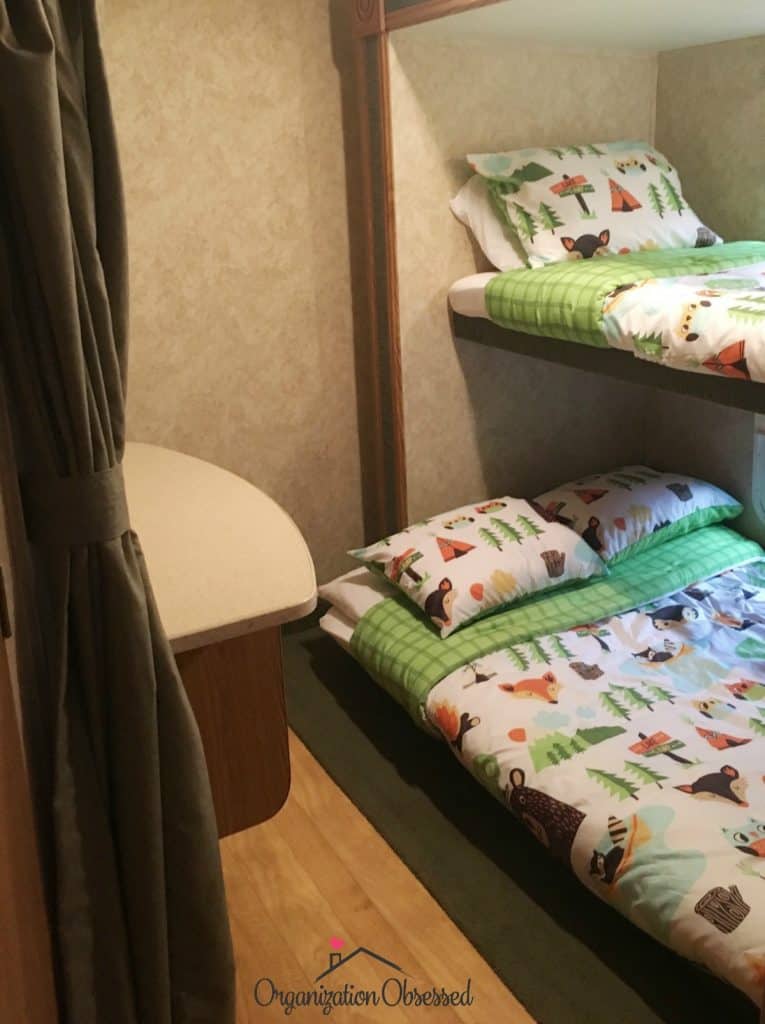
Our little boy’s bedroom is my favorite room in the camper! This bedding set could not have been more perfect! It is the Campfire Critter Comforter set by Pillowfort. Unfortunately, I don’t think they make it anymore but here are some really cute similar sets!
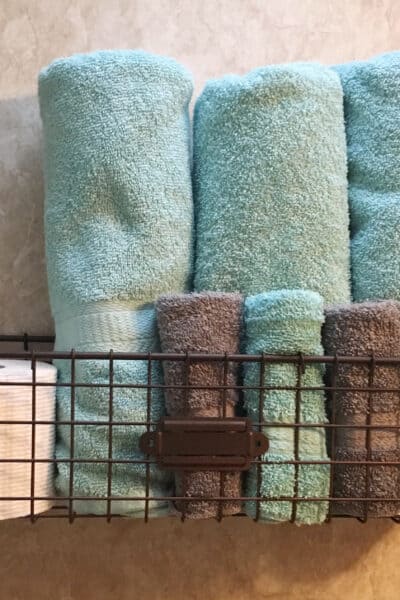
Bathroom
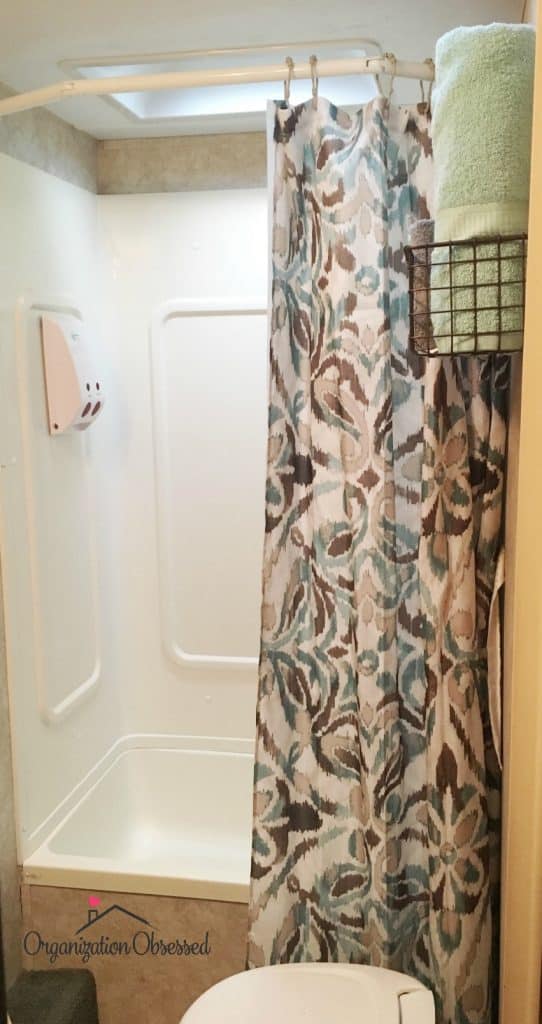
Our bathroom was an easy remodel. We just added a new shower curtain and a wall mount storage basket to hold our towel and extra RV toilet paper. I tried to add backsplash behind the bathroom sink as well but it would not stick. I think the room had too much moisture and the adhesive could not stick to the wallpaper because of it.
Master Bedroom
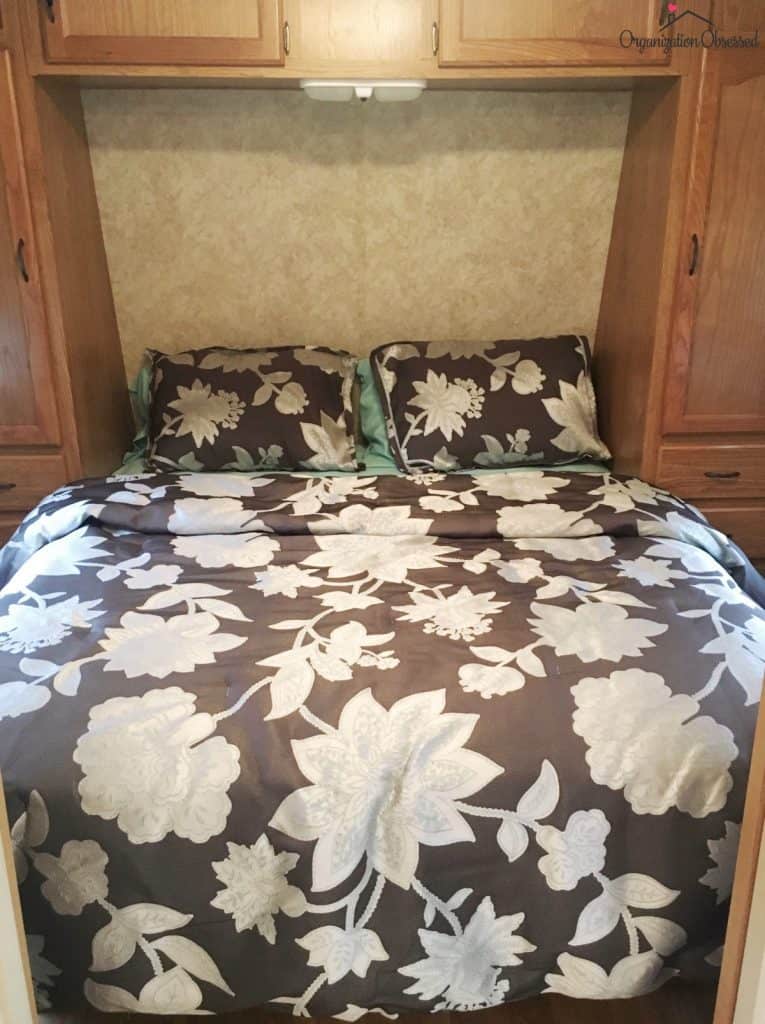
The master bedroom was easy too! Nothing had to be remodeled so we just hung fabric storage organizers in each closet to give us extra room for our clothes. The bedding we used is from Martha Stewart and it used to be in our bedroom at home. Since we weren’t using it anymore and it went along with the colors and design of the camper, I thought it was the perfect place to get a little more use out of it!
Outside
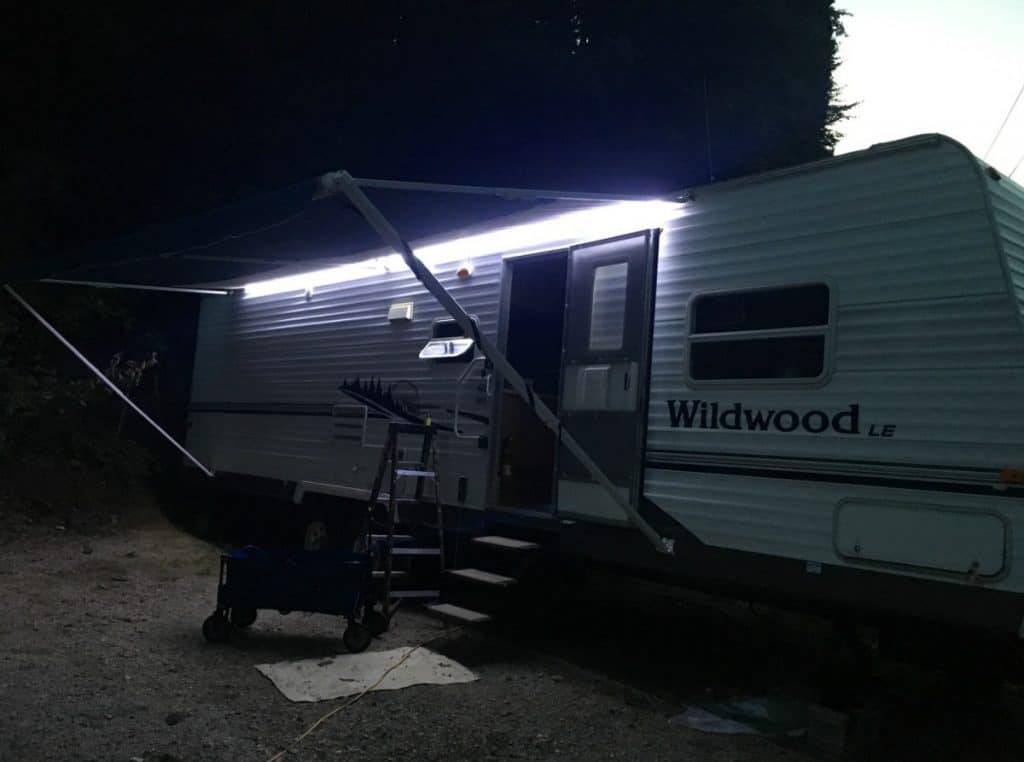
The final project on our camper was to add a strip LED lighting system. I didn’t want to fool with hanging lights from the awning ever time we went camping. They are really pretty but it seemed like a waste of time to me. So instead my husband installed the mounted LED lights and wired them into a switch inside the camper. They are so bright and give us a ton of light at night!
So that’s our full camper remodel! In total we spent less than $1000 dollars to remodel our camper. I hope this gives you the inspiration to take on your own camper remodel project! It was such a fun project for my husband and I. It took about two weeks of work but in the end, it has been so worth it!
Comment below and let me know what you think!
You May Also Like: How To Reupholster Camper Cushions
[thrive_leads id=’6446′]